Science Project: How to Make Homemade Ice Cream
I Scream, You Scream, We All Scream for Ice Cream!
Jul 10, 2019As warmer weather comes rolling in you might be thinking more and more about cooler sweets to eat, namely ice cream. Or maybe you think about ice cream all the time, no matter what the temperature. Regardless, ice cream is definitely one of the most delicious treats you can have, but did you know you don’t only have to buy it at the store? You can make it yourself! Make homemade ice cream to celebrate National Ice Cream Day on July 21st, 2019!
Ice Cream is also a wonderful demonstration of what salt can do to ice. This is when we get science-y. Hope you’re prepared!
 Yum! Ice Cream!
Water has three states: solid, liquid and gas. Water changes into its solid state when it reaches 0 degrees Celsius (32 degrees Fahrenheit), but if there is Sodium Chloride (NaCl) present, otherwise known as salt, then that temperature drops. That’s because salt lowers water’s freezing point. Have you ever noticed how when the sidewalk is icy they put salt on it to melt the ice and make it safer for walking? That’s the same principle. The salt they put on the sidewalk mixes with the ice and because it's freezing point is lower than the temperature of the unsalted ice, the sidewalk melts.
When you're making ice cream the lower temperature of the ice and salt mixture, which surrounds the cream and sugar mixture, is cold enough to change the state of the cream from a liquid to a solid, hence the name ice cream! So let's get started!
Materials
- 1/2 cup milk
- 1/2 cup whipping cream or heavy cream
- 1/4 cup white sugar
- 1/4 teaspoon vanilla extract
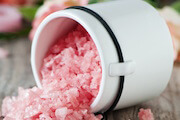
- 1/2 to 3/4 cup sodium chloride (NaCl) aka table salt or rock salt
- 2 cups ice
- 1-quart Ziploc bag
- 1-gallon Ziploc bag
- Thermometer
- Measuring cups and spoons
- Bowls, cups, spoons or cones to serve your ice cream treat
 Gather Your IngredientsCourtesy of Lemonythyme
Procedure
- Add 1/4 cup sugar, 1/2 cup milk, 1/2 cup cream, and 1/4 teaspoon vanilla to the quart Ziploc bag. Zip that bag up so nothing leaks!
- Put the 2 cups of ice into the gallon Ziploc bag.
- Use the thermometer to measure the temperature of the ice in the gallon Ziploc bag. Make sure to record this number so you can record
- Add 1/2 to 3/4 cup salt (sodium chloride) to the gallon Ziploc bag of ice.
- Place the sealed quart bag inside the gallon bag of ice and salt. Seal the gallon bag securely.
- Rock the gallon bag from side to side. Hold it at the seal so that the cold ice doesn’t freeze your hands instead of your ice cream. You can also use gloves or a cloth to protect your hands, just remember it will be colder than 0 degrees Celsius!
- Continue to rock the bag for 10-15 minutes or until the contents of the quart bag have solidified, or until you can’t wait for ice cream anymore.
- Open the gallon bag and use the thermometer to measure and record the temperature of the ice and salt mixture. Notice how much colder it is than the ice on its own.
- In bowls or cones serve and most importantly enjoy your homemade ice cream!
 Ice Cream made in a bag!
Toppings
There’s always the possibility to add all different types of toppings: chocolate sauce, sprinkles, caramel, strawberries, chocolate chips! Feel free to add these ingredients to the quart bag before you mix everything, but know that your mixture will turn to ice cream much faster if you hold these special treats and add them as toppings.
 What is your favorite topping?Courtesy of Joyofkosher
Ice Cream Maker
This is a very easy way to make some delicious ice cream! If you are interested in making your own homemade ice cream all the time you may want to look into an ice cream maker. It still uses the ice and salt mixture to freeze the cream it just provides an easier and higher volume way to make ice cream at home.
Have Your Say!
What’s your favorite ice cream flavor? Share it with us in our comments section below.
Related Articles:
- Play & Freeze Ice Cream Maker Review
- I Scream, You Scream
- Science Project: Make Your Own Crystals
- More Science Help


